Quickstart
From an empty repository to a first pull request opened by an agent.
The smallest useful factory: a maintainer labels an issue ready-for-agent, an agent opens a pull request, and a person merges it. About ten minutes.
- A person acts
- An agent
With Claude Code
Paste this prompt in Claude Code, opened in your repository. It installs openfabriq and what it needs, then does step 1 with you: it writes the factory and pushes it once you say yes. Then start the engine yourself (step 2): it runs as long as its terminal stays open.
Let your coding agent set it up. One prompt for Claude Code installs openfabriq and what it needs, writes a first factory with you and saves it. You then run one command: openfabriq start.
Read the prompt
Set up openfabriq in this repository, from nothing to a first factory. openfabriq runs AI agents described in an openfabriq/ folder of a repository, on this machine, with Claude Code and the gh CLI: https://github.com/openfabriq/openfabriq

Do everything yourself, step by step: run the commands, do not hand them to me. Stop only for what you cannot do: a command that asks for my password (sudo), a login in my browser, or a choice that is mine. Then give me the exact command or question, wait for my answer, and go on. Never print a token or a password.

First check that this folder is a git repository with a GitHub remote (`git remote -v`). If it is not, stop and tell me.

1. Check that this machine runs macOS or Linux. On Windows, stop: openfabriq does not run there.

2. Install what is missing:
   - openfabriq, if `command -v openfabriq` finds nothing: with Homebrew when `brew` exists, `brew install openfabriq/tap/openfabriq`, which also installs Node and the GitHub CLI; otherwise `npm install -g openfabriq`, which needs Node 24 or later (`node --version`; if Node is missing or older, tell me how to install it). If npm refuses to write its global folder, do not use sudo: tell me.
   - the GitHub CLI, if `command -v gh` finds nothing: `brew install gh`, or on Linux the command for my distribution (it needs sudo).
   - on Linux, the sandbox of the agents' shell: bubblewrap, socat and ripgrep (`sudo apt install bubblewrap socat ripgrep` on Debian and Ubuntu).
   `openfabriq` with no arguments then lists its commands.

3. The logins. Claude Code is logged in already, since you run in it. If `gh auth status` says I am not logged in, ask me to run `gh auth login` in my terminal (it opens my browser) and wait. If `git config user.name` or `git config user.email` is empty, ask me for the name and email the commits should carry, and set them with `git config --global`.

4. Run `openfabriq doctor`. It checks the logins, the git identity and, on Linux, the sandbox tools. Fix each ✗ line yourself when you can, as above; otherwise give me its fix and wait. It also says openfabriq/ is missing: that is expected here.

5. Write the first factory. `openfabriq init` needs an interactive terminal, so do its work yourself: read the setup skill shipped with openfabriq, and the reference.md beside it, then follow it to the end. The openfabriq command is `openfabriq`.
   "$(dirname "$(realpath "$(command -v openfabriq)")")/../plugin/skills/setup/SKILL.md"
   It asks me a few questions, writes openfabriq/, validates it, explains the plan, security changes first, and pushes openfabriq/ to the default branch once I say yes.

6. Finish with the one command left for me, in a terminal I keep open: `openfabriq start`, in this repository. It applies the factory once I answer `y`, then runs the agents, with a board at the address it prints. Then tell me how to try it, as the setup skill says.
By hand
Install openfabriq first, then run the commands below in your repository's folder.
Write the factory
openfabriq initClaude Code reads your repository (README, test commands, labels, CI), asks a few questions, and writes the openfabriq/ folder. It checks the files, explains what they will do and, once you say yes, pushes them to your default branch: the engine runs what is merged.
Start the engine
openfabriq startIt shows what will change, security first, and asks: answer y. It creates the factory's labels on GitHub, then reads the repository's new events every minute. Keep this terminal open, and open the studio at the address it prints: http://127.0.0.1:4310/?token=….
Give it an issue
On GitHub, open an issue that describes a small change, then add the ready-for-agent label. Only a maintainer's label counts: your GitHub login must be in maintainers, in openfabriq/factory.yaml.
Within a minute, the run appears on the studio's board. A few minutes later, the pull request is open, linked to the issue, with proof that the tests pass.
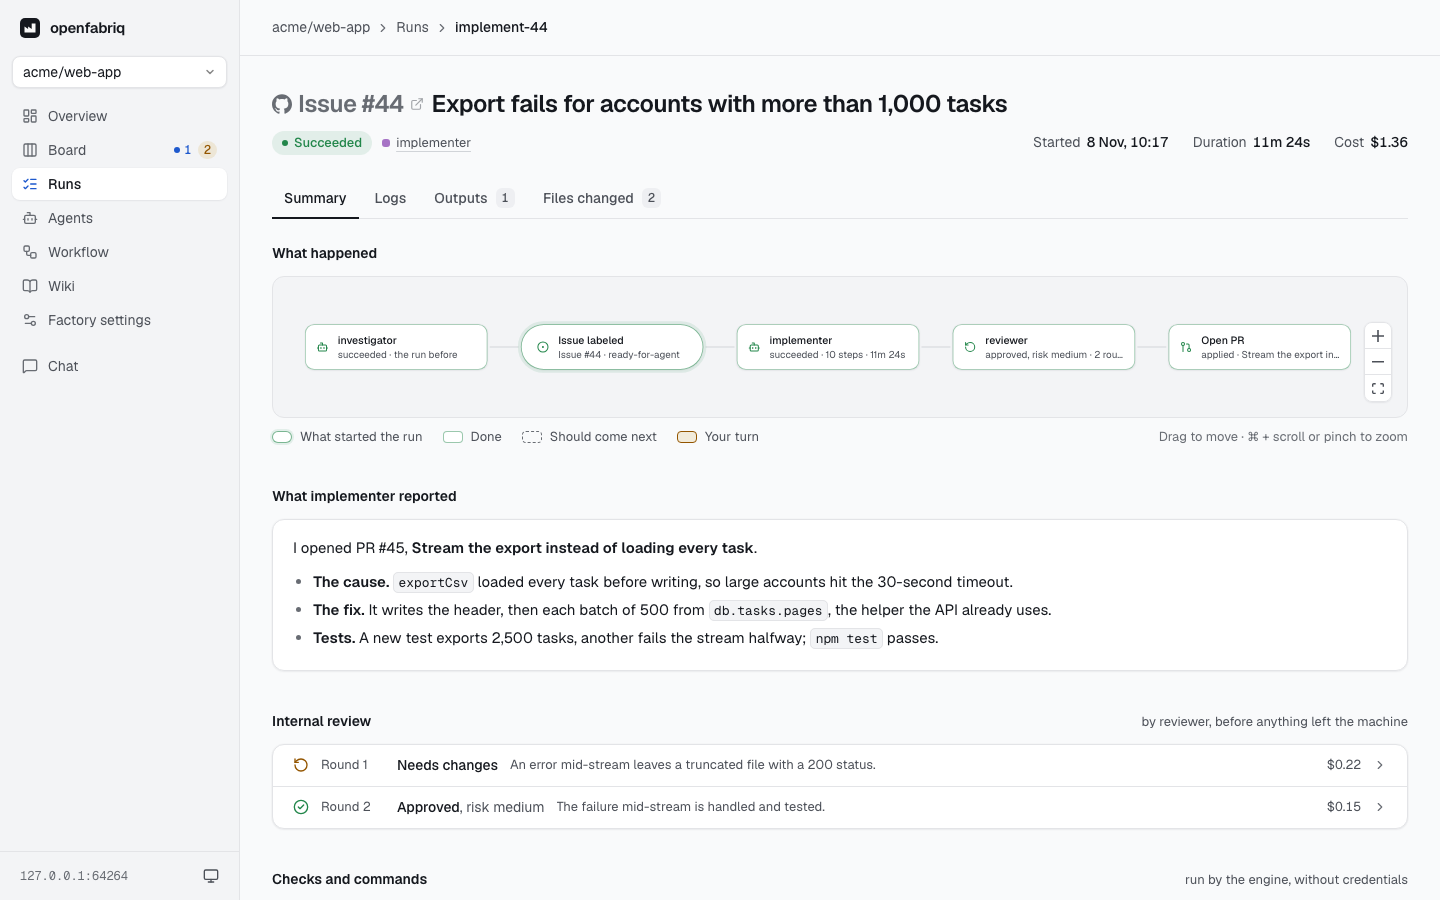
Ask for changes, then merge
Comment on the pull request as you would to a teammate: @openfabriq add a test for an empty title. The agent pushes to the pull request and answers in a comment. Comments without @openfabriq start nothing. A review that requests changes, or a conflict with main, sends it back too. When the pull request is right, merge it yourself.
Go further
- Start from a template instead of
init:openfabriq init --example 01-quickstartcopies it, with your repository and login filled in. Set itssetupandtestcommands infactory.yamlto your project's. See Templates. - Check before you start:
openfabriq validatechecks the files,planlists what would change,applyapplies without starting the engine. See Plan and apply. When something does not work, runopenfabriq doctorfirst: see Troubleshooting. - Change the factory: run
initagain and describe the change, or edit the files by hand, as in Your first factory. An edit runs once applied:startoffers it. - Keep a map of your code in
wiki/, for people and agents: Wiki. - Extend the factory with triage and a review before the pull request: the 02-sdlc template, or Automations.
- Require proof before any pull request with the harness: the engine runs your tests itself.
- Start work from your team's tools with the integrations: Slack, Linear, Sentry and webhooks.
- Run the engine for a team on an always-on server: Deployment.